Another month has gone by and I’m still finding new and interesting things I can do with my printer!
Most of this month was spent developing our first tool, the Cable Retainer!

I was approached with a request to design a tool that can hold a wire in place in a 1 inch hole, that can then be found through drywall and retrieved. My client had a tool made for this in use, however it was performing poorly and repeatedly breaking when used. I was confident i could make a tool that accomplished their needs well, and while i made it there, it certainly wasn’t a walk in the park.
The first draft was a bit crude, the original idea was to have it simply screw into place, and then be unscrewed with a bolt and a steel threaded insert in the base, however testing showed that the steel insert wasn’t enough to be able to locate the insert accurately through drywall with a magnet. While the screwing method did work by having threads on the outside (not shown) I found that it required too much force to get the tool seated, and too much force to then release it. It also wore down the threads faster than was acceptable with my durability standards.
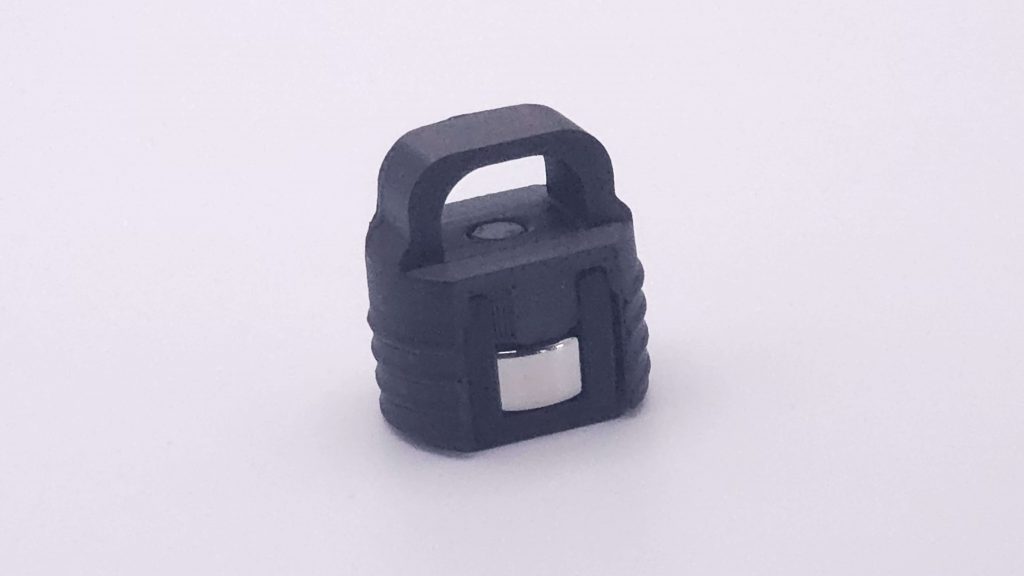
One aspect of the design that i was satisfied with was the strength of the cable retaining section. While testing it’s tensile strength i decided to loop the wire through 1 half of the tool and support my entire body weight off of it, and it didn’t even bend! I have to say I’m absolutely in love with my carbon fiber reinforced PETG. It’s been able to handle far more abuse than i would expect any plastic to take, and it has truly earned it’s place as my go-to material for maximum strength.
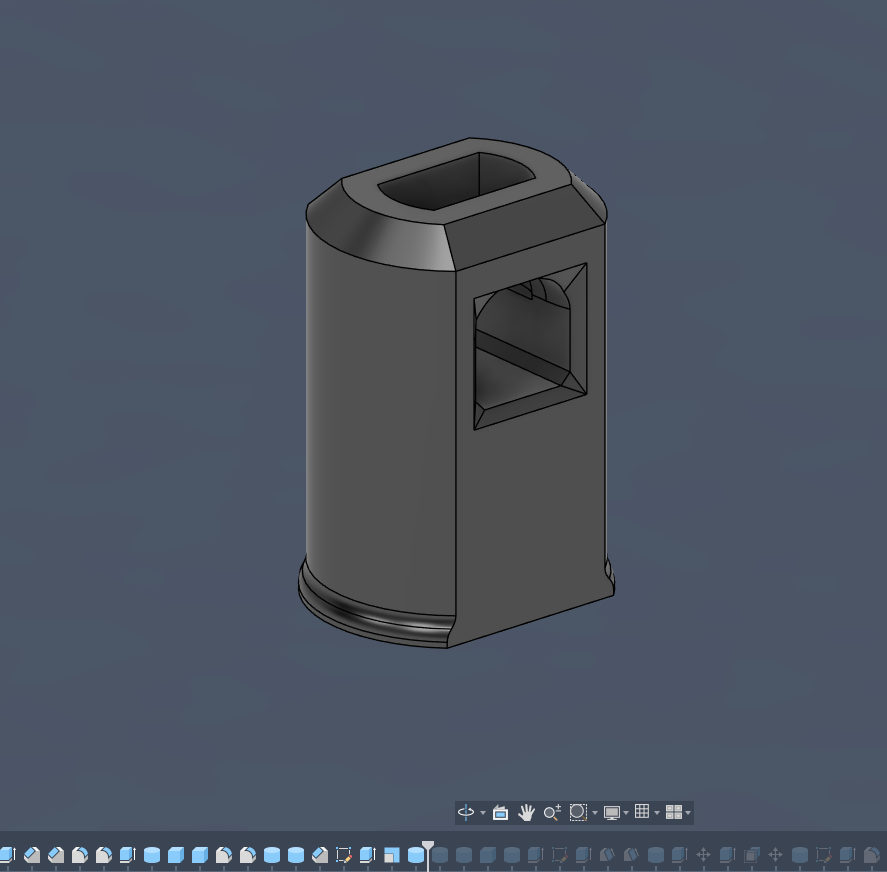
Once it was clear the steel insert would not be sufficient for locating the tool with a magnet, i switched to adding a stack of neodymium disk magnets to the tool. It was a bit of a challenge to shape the tool to where i could add them while still printing the tool on its side for maximum strength. I really wanted to keep the tool as a single part, but i found it wasn’t feasible to fit the magnets in and keep the tool sturdy, so i moved to the 2 part design that made it into the final product.
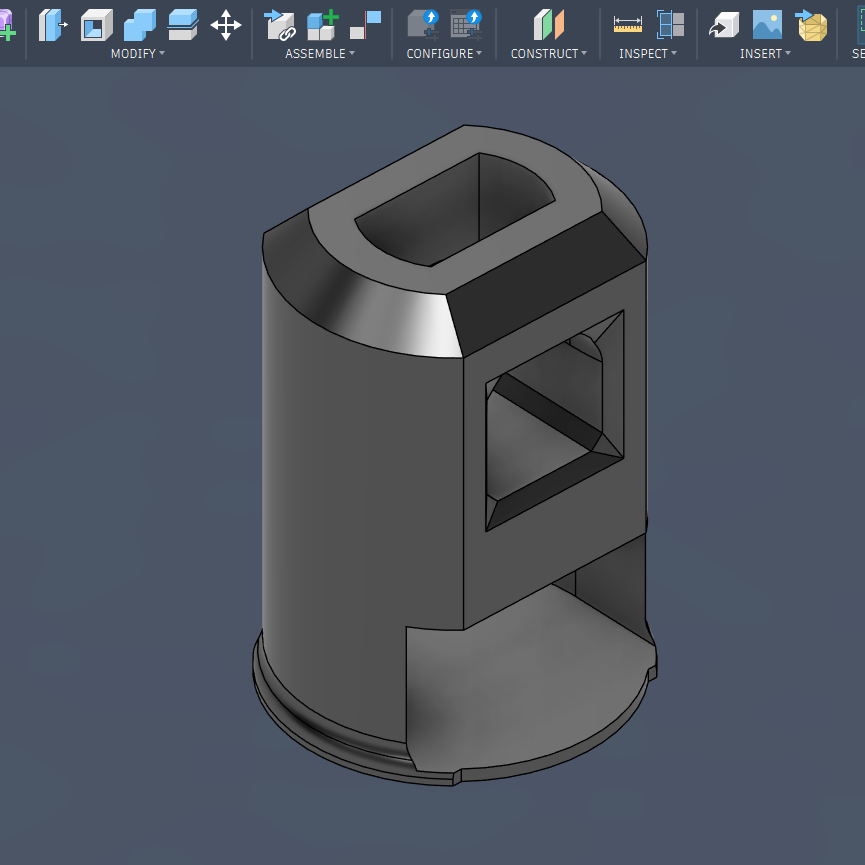
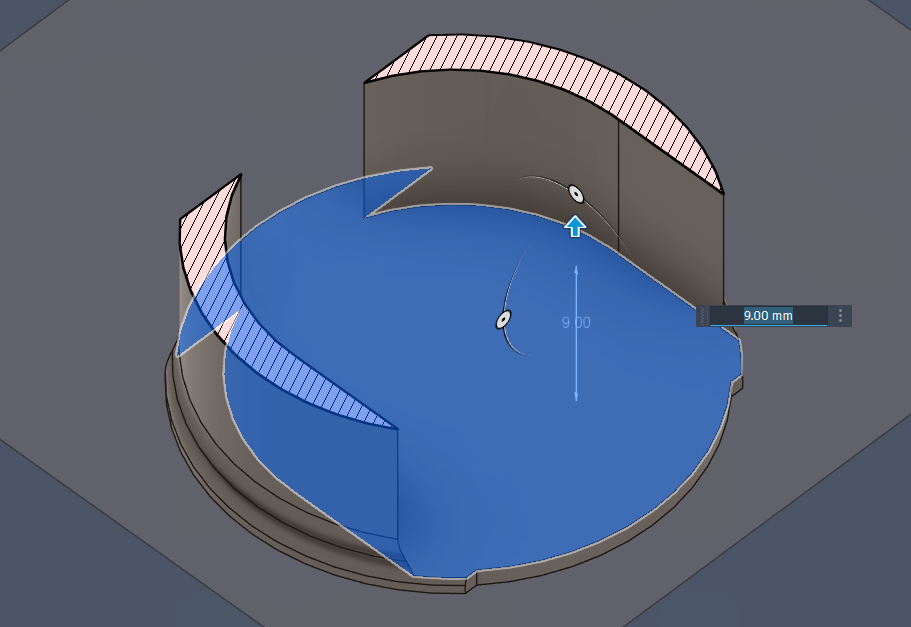
The plan was to have the magnet slide in from the right side, however that left the walls too thin.
Through a lot of iterative development i began to refine the tool. The first functional prototype was a hit with the techs who were testing it, however it needed some improvements. They wanted it to be shorter, have a single loop for the cable instead of 2, and they wanted a stronger magnet. I’m happy to say i think i accomplished all of those requirements.
I’m skipping some development as i went through over 12 variations of the tool before settling on the final design. I tried different ways of gripping the sides of the hole, holding the magnet and bottom piece in place, and spent a bunch of time slightly changing the thickness of parts to get the right balance of durability, retaining force, and ease of removal. All of this culminated in the final design that is now for sale on our website!
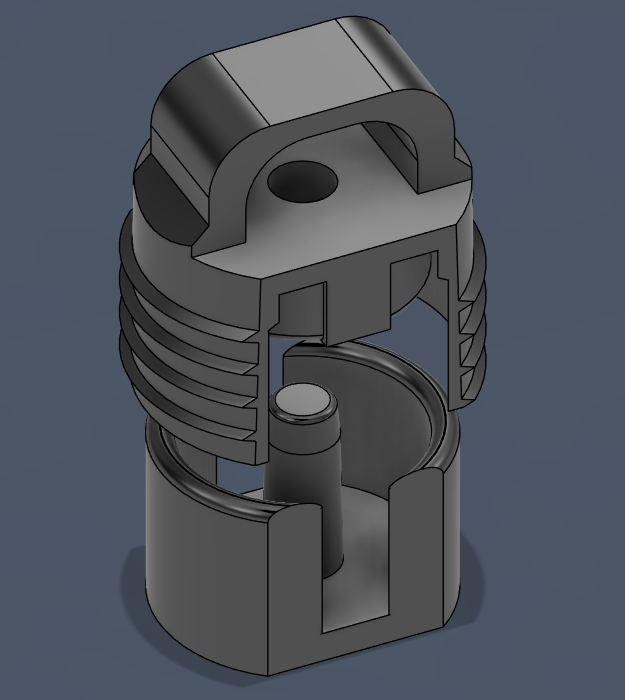
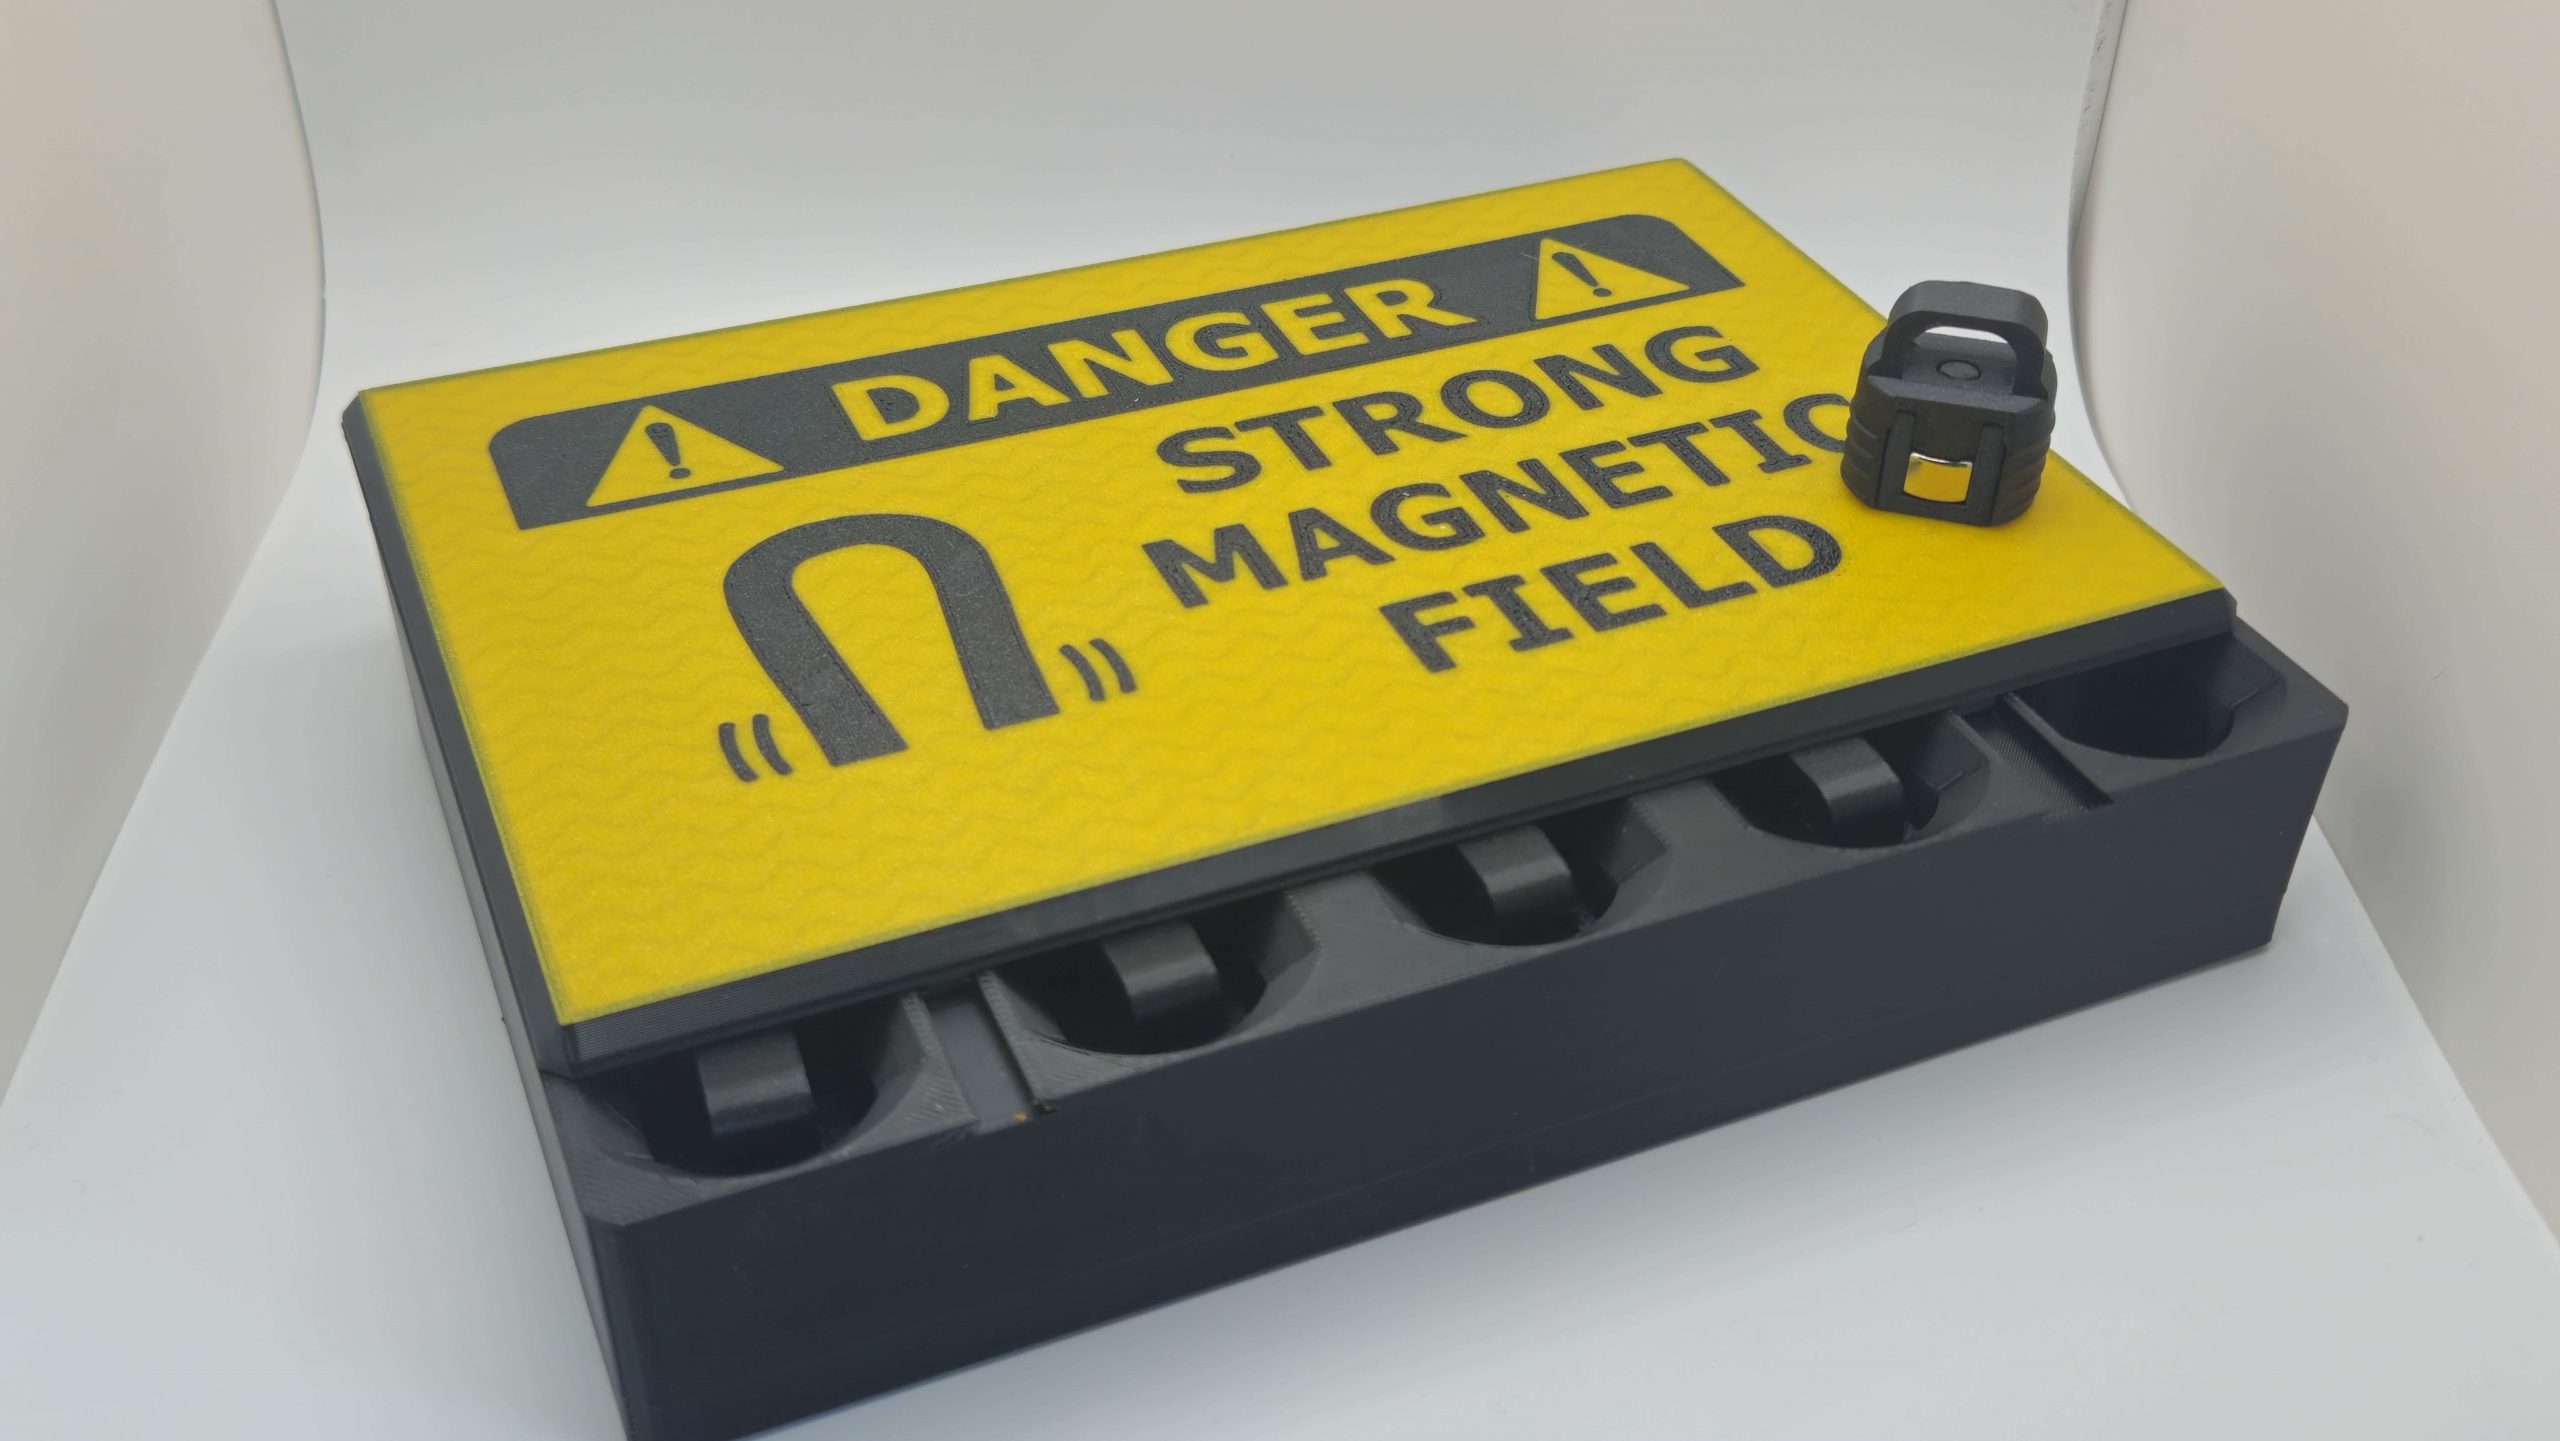
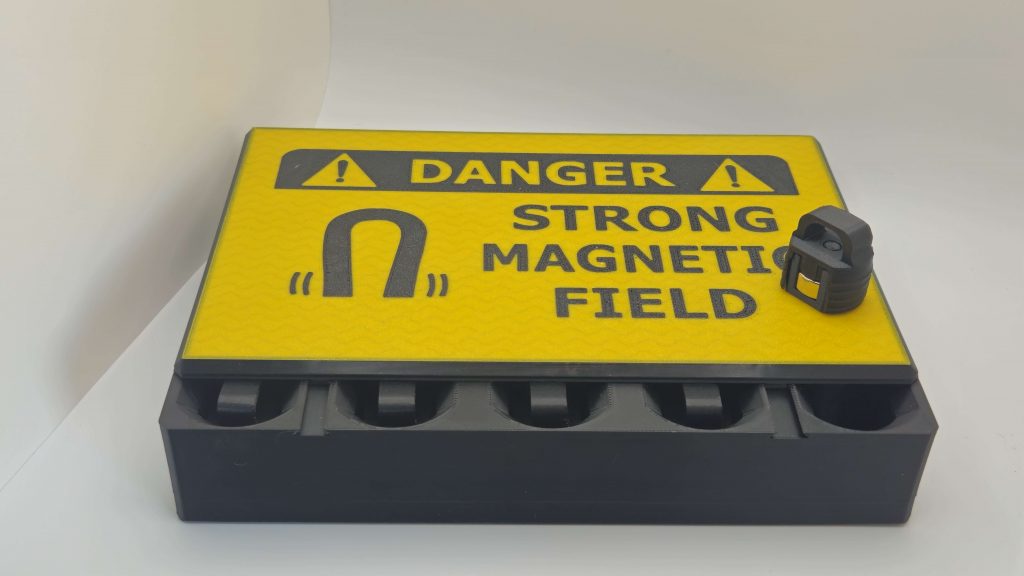
Standing in at just shy of an inch tall, this thing is quite a stout tool for such a small package. I got some frankly scary, super high grade neodymium ring magnets to use. I opted for the ring because that allowed me to add the center post for strength and better magnet retention, it also helped that the ring magnets were slightly cheaper than the normal disks, despite being stronger? Not sure how that works out but I’m not complaining.
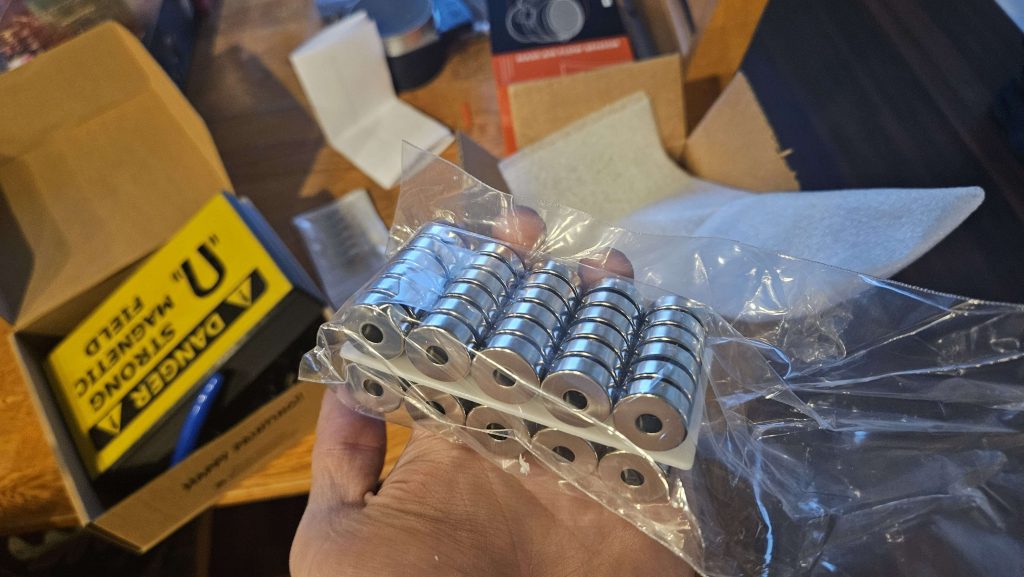
These magnets are genuinely a hazard to handle on their own, especially when there’s multiple of them stacked together which is how they ship. Twice i didn’t have my wits about me while handling them and twice i had them snap together and properly pinch my hand, one time it was strong enough to draw blood. (yikes!) While working with them i partially corrupted my hard drive and i also accidentally magnetized the tube TV i have on my desk and discolored it, thankfully i was able to fix both of them later.
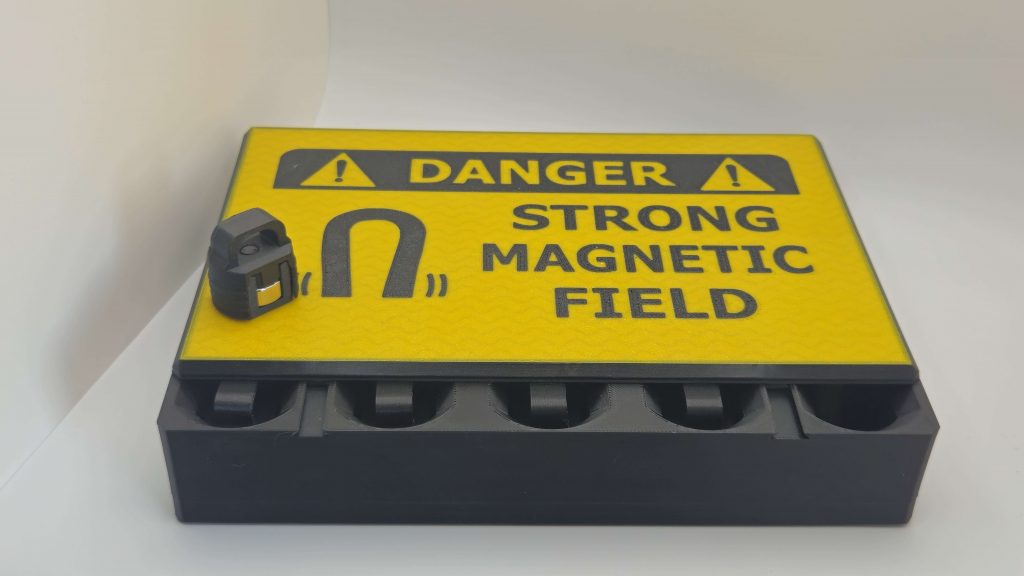
Because of the hazardous strength of the magnets, i realized i needed to make some sort of case for containing and transporting them safely. Due to the limitations of time and my build plate size, the box i created has the tools close enough together that they do push against each-other, and have the unfortunate tendency to jump out of the box when opened. Apparently my client used this to prank people in their office by having them jump out like a joke Pringles can. While i do have to admit i find that story hilarious, i should stress that they are not toys and i am not responsible for any damage to persons or property if you break something while pranking your coworkers.
Given some more time i would like to improve the carrying case to try and solve that issue, however i’m going to need to study the laws of magnetism before i can make that improvement.
All in all i’m very happy with how the tool came out. I’ve heard some glowing praise from the techs that have been using it so far and that fills me with joy. That isn’t to say i won’t improve it in the future if anyone has requests or notices design flaws, it can always be made better.
As you can see, my printer and i had our hands full for most of this month, i did have a little time on the side to work on my project car however. I got some semi-transparent emerald green flexible filament to try out and i think it looks fantastic! i have some ideas for making replacement interior parts out of this material but i prefer to show not tell, so you’ll see that when it happens. I did make myself a custom adapter to install my MAF sensor on my engine because the parts store was out of stock of the adapter i needed. While i didn’t explicitly need to make that part, I’m glad i did as i think it looks fantastic in my engine bay. I also added a spiral groove to it to run a light strip in the future which i think is going to look awesome.
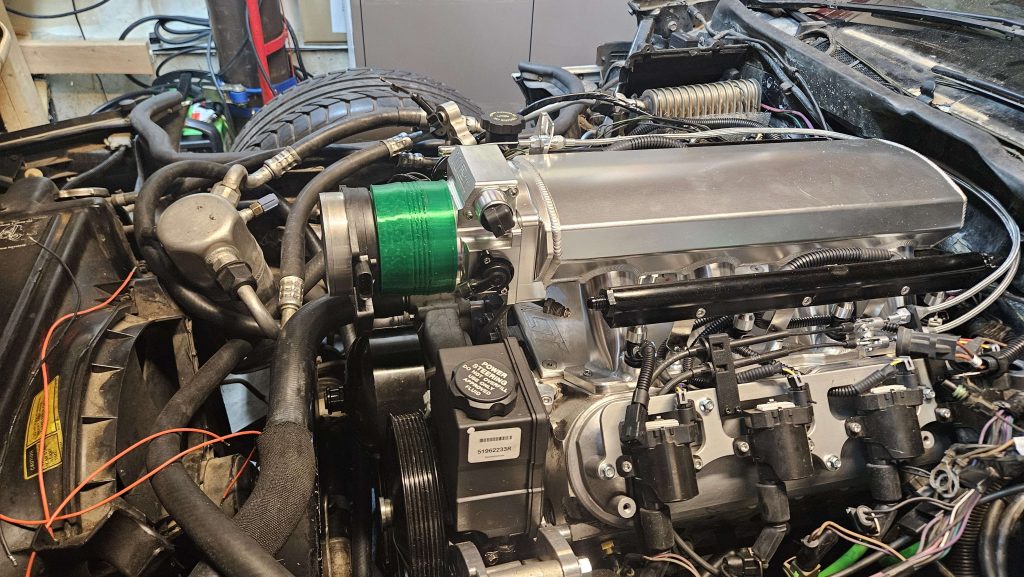
I’m continuing to use my corvette as a testing platform for 3D printed automotive parts, to see what works and what doesn’t, and to see how different materials hold up to time and real world usage. I’m hoping to get it running and driving soon so i can take it to car shows to showcase my skills and all the things that are possible to make on a car with my printer.
That’s all for this month, thanks for reading! I’m excited to see what i can come up with to make in march.
-Sparky